Kid Craft Clutter
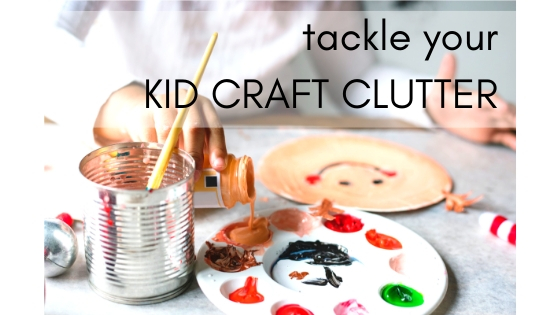
I don’t know about you, but crafting is LIFE for my kiddos. But it means that if we aren’t careful, we end up with a whole lot of kid crafting clutter! My kids craft at our well-loved kitchen table which shows all the marks of this joyful pastime. It’s one of those things that makes me smile and cringe simultaneously, but I value them using their imaginations and creativity over the mess. And my table was a $20 craigslist re-finish placeholder (check out my post about placeholders in your home)… so I don’t worry too much about it.
In our dining room, we have a ‘craft dresser’ that showcases some of my bobbles and favorite things, serves as a beverage station during family parties and holds all the crafts and crafty play items my kiddos have. But, this dresser can get out of control quickly if we aren’t intentional about keeping it cleaned out and organized. When it gets crammed full or messy, I can see the urge for creative play stops for my kids because it’s too overwhelming to find what they want.
So if we value creativity, we should also value the organized space that allows it to happen.
If your craft space feels a little overwhelming, cram-packed, or messy I am here with some step by step tips to get it under control again. These tips apply to ANY craft space, adult or kids, so if it’s YOUR craft room that needs a hand, keep reading.
Step #1 – Decide where to start and focus only there.
If you have multiple surfaces or furniture pieces or if you have baskets or shelves that house your crafting supplies, start with just one. The whole space can feel really overwhelming so choosing just one drawer, shelve or basket to start will make the job feel more manageable.
Step #2 – Empty it all out.
It’s much harder to decide what to keep when you take items out one by one. When you empty the whole basket or drawer on to the ground or a table, you are able to get a better sense of what you have and what you no longer need.
Step #3 – Start with the easy stuff first.
When you are sorting through the piles, go for the immediate no’s first. Empty paint jars, brushes the kids neglected to rinse, broken crayons, dried out markers, scrap paper, dried up playdough… these are all easy tosses. Then move to the immediate ‘keeps’. New crayons, clean papers, unopened glue sticks, and bottles. Set these aside in a pile.
Step #4 – Use containers.
You’ll be able to maintain your decluttered and organized spaces better by utilizing containers, boxes, and jars to house your items. I keep the playdough in a plastic bin like this one so the kids can grab the whole bin to play and not have to make multiple trips to and from the drawer. When it’s easier to get out, it’s also easier to put away!
Step #5 – Trust your gut and move quick.
Once you’ve moved past the easy stuff that was an immediate yes or no, it’s time to deal with those ‘maybe’ items. In this situation, you’ll need to trust your initial reaction to each item. Your head is going to butt in and tell you to override that initial feeling. Your brain can devise a million ways a particular item could get used, or tell you that your kids “might” play with this later, or convince you that you will actually finish that project that’s been hanging out half done for the last 7 months. If you or your kids have unfinished work, ask yourself this question: If I have free time right now, would I sit down and work on this? If the answer is no, let it go. Sometimes what was fun is no longer enjoyable. Give up the guilt and give up the project.
Step #6 – Ask why.
If you are flip-flopping between keeping or tossing something, there’s probably a reason. Ask yourself if your feeling guilty? Is it a project your kid created and then it found it’s way back into the drawers? Chances are they don’t even remember it’s there and their joy was in the creation process. We aren’t required as parents to keep every last ‘art’ project our littles create. My kids could have filled a house with the pictures and crafts they’ve created!!! Each one brought them a joy to create and present to me. Each one gave me happiness to ooh and ahh over and later after it’s purpose was served, I’ve learned that I could let it go.
When it comes to decluttering, your best decisions are usually the hardest.
Step #7 – Don’t have FOMO.
Most of the time, we end up with clutter because of Fear Of Missing Out – we fear that if we get rid of stuff, we will want it later. If we toss that watercolor set the kids never play with, will they suddenly ask where it is? If I donate all that scrapbooking stuff to the pre-school art center, will we suddenly decide to document the last 5 years of our kid’s lives? Chances are if we haven’t used these items, we still won’t even after we organize them. So, decide to either set a firm deadline to finish a project or let the items go. When it comes to kids stuff you are unsure of, put it out of sight for a week. If they don’t look for it, you can feel free to let it go.
Step #8 – Know your kid’s style.
If you are a parent to younger kids or kids that appreciate the end result of a decluttered space, go ahead and tackle the project on your own. If your kids have lots of opinions on what they do and don’t like, ask them to tackle this project with you. By giving our kids some parameters to work in like, ” we can keep any playdough that isn’t dried up or choose 6 of your favorite paint brushes, they can participate in the process while still getting to keep what they love and use.
My daughter, for example, had a bag full of stones. When we talked about what she would do with them, she didn’t really have a plan. So we agreed to keep 10 of her favorite ones. She happily picked through which ones she wanted and we got rid of the rest.
Step #9 – Touch everything.
This is probably the hardest step of all, because as you make progress you may reach the point of “good enough”. While I am all about progress over perfection, getting a space to the best version of itself means that you should and need to TOUCH EVERYTHING. Check each marker to see if it’s dried out, search for each container of dried clay or paint. Ask yourself if you need everyone of those fabric scraps or kids scissors. Going through every item in your craft station (or room) will ensure that you end up with only what you love.
Step #10 – Have a plan for the things you let go of.
Recently, I sorted through my daughter’s craft station in her room with her. She had a huge pile of paper punches and scrapbooking paper. I knew these weren’t items she ever used. We decided that they would be of more use in the art room at her school. Old note cards and paints are loved by preschool teachers everywhere. More advanced crafts could be given to senior centers or middle and high school art programs. If it’s not something in good condition, that is brand new or works well, just toss it. The freedom of space will be worth it. And, if you have lots of great quality items like yarn, ribbons etc, you can try to sell them on Facebook Marketplace or something similar. Just make sure that the time and energy it will take is worth it. Most times, donating things is the best route to take.
Wrap it up
Now that you’ve got the step by steps, I challenge you to get going on your kid’s (or your) craft space! Creativity is such a gift and something that I think all kids should have ample time to focus on. Kid really do operate better in simple and clean spaces. Clutter can stand in the way, so get organized and get crafting!
What tips and tricks do you have to keep your kids craft stations clean and organized?
If you enjoyed this post, you may also enjoy:
8 Steps to Declutter Your Closet
Favorite Storage Solutions:


